
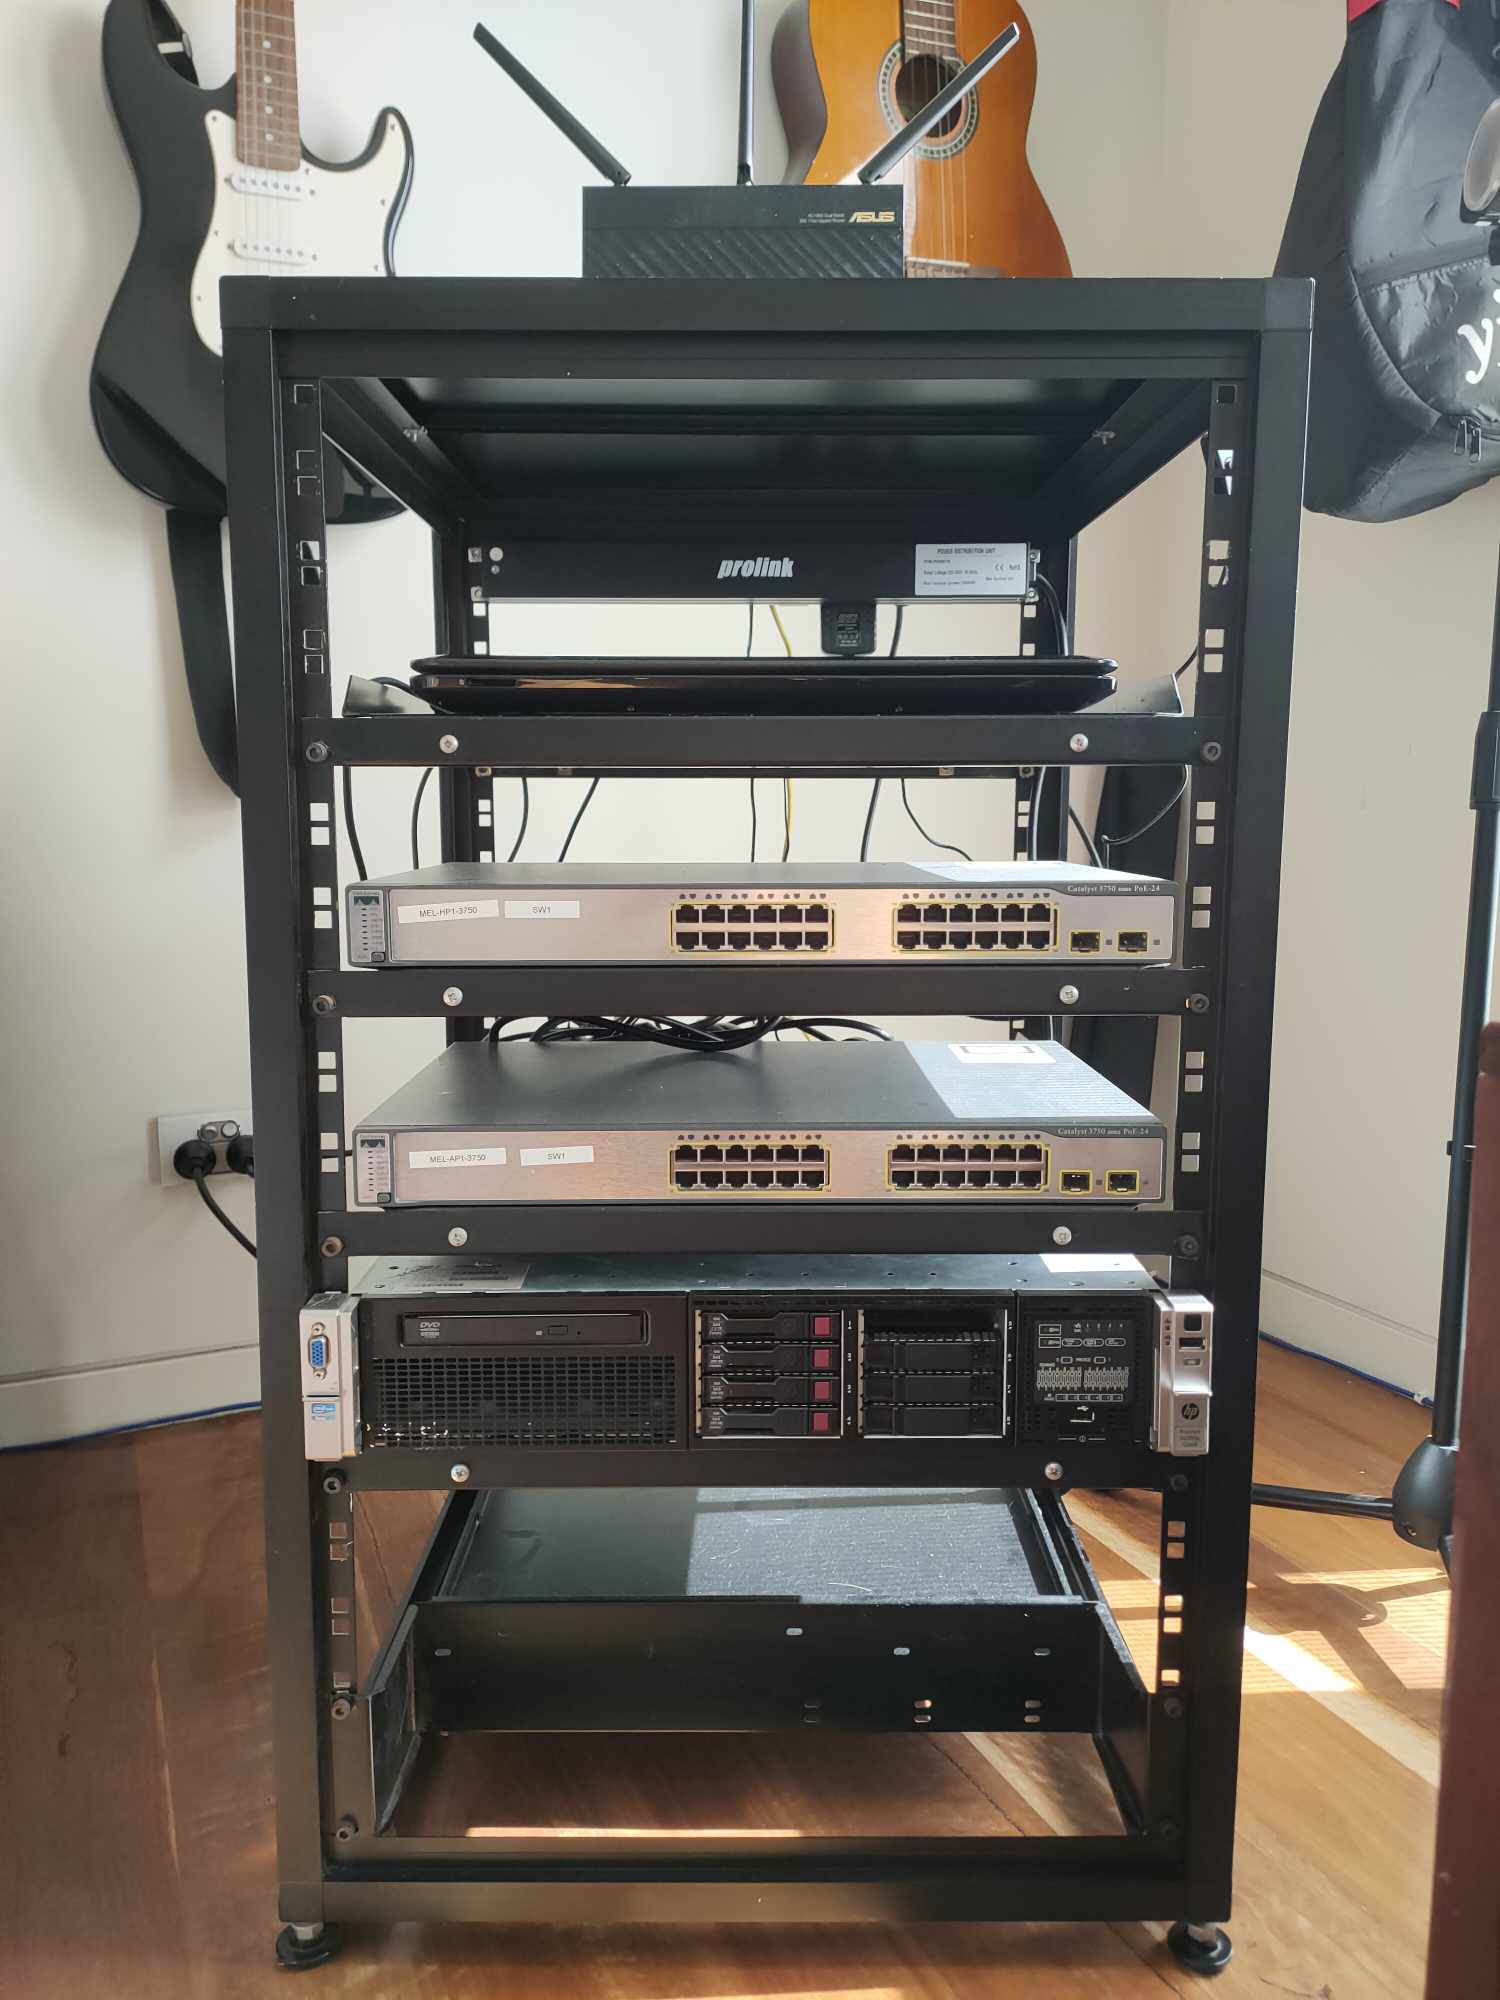
In collaboration with a couple of friends well versed in the field of Networking, I made the decision to purchase a HP Proliant DL380P G8 through Ebay. I chose this server as it was compatible with the latest version of VMware ESXi at that time, having excellent specifications relative to its cost.
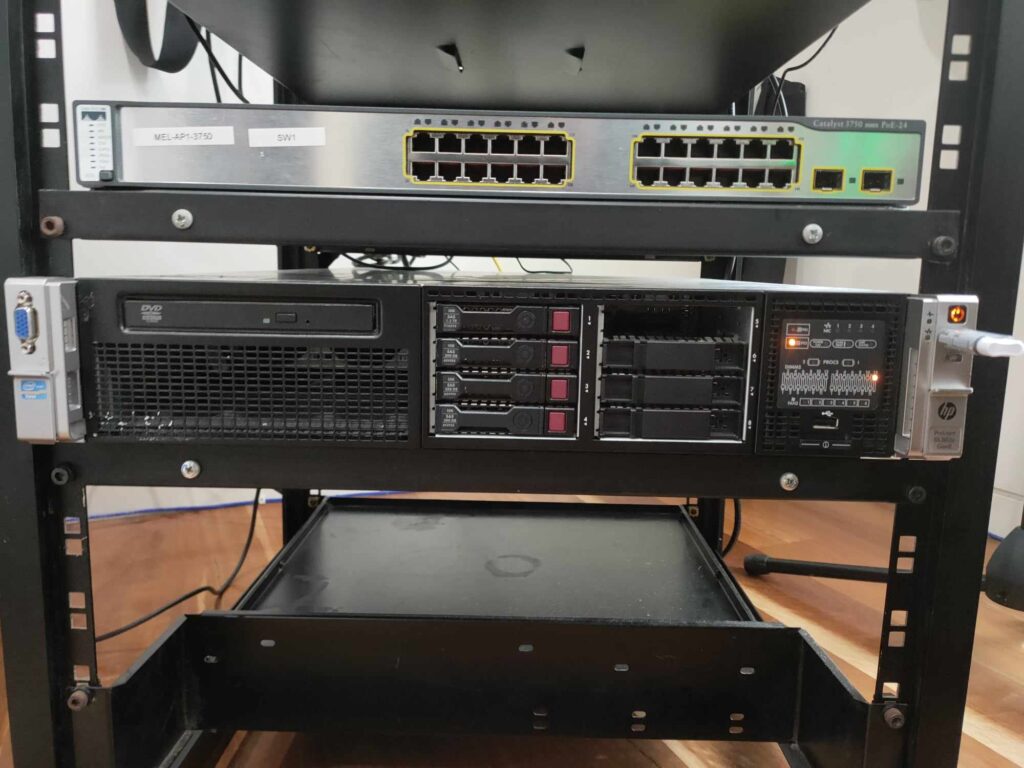
I began the installation by securely mounting the server in the rack and connecting the power alongside my switches, home router and Raspberry Pi Server. I proceeded to integrate peripherals, including my mouse, keyboard and monitor via a VGA cable.
Having a 16GB USB at my disposal, I went ahead and installed the ESXi boot on it. After completing the installation, I inserted the USB into the server and powered it up.
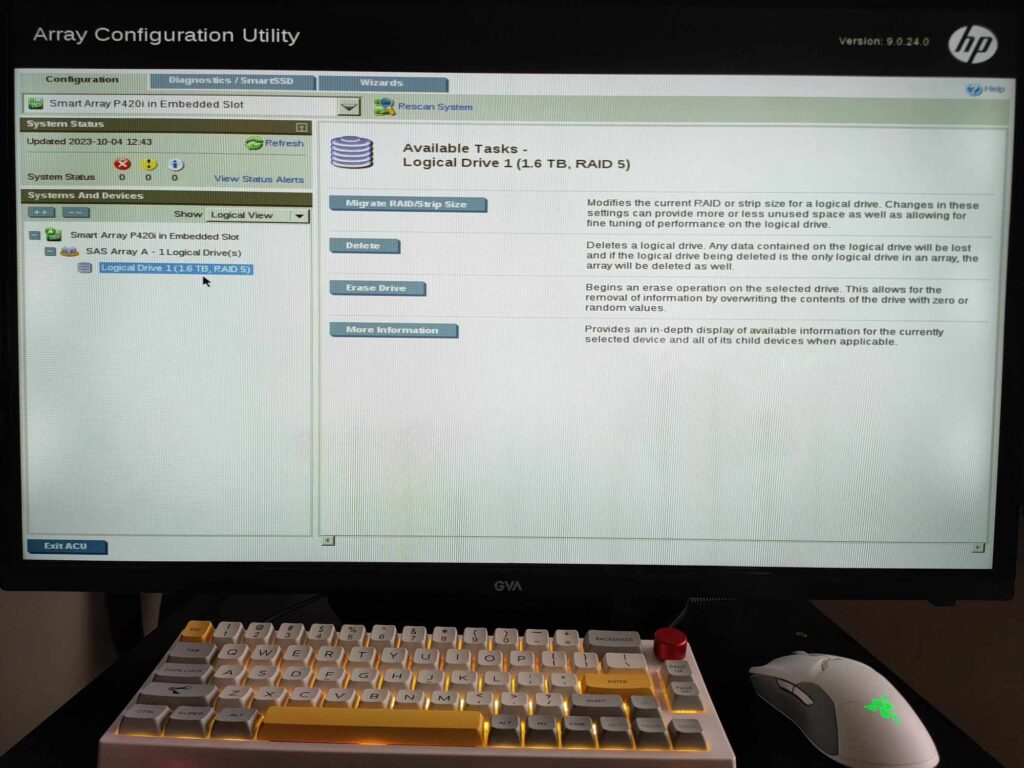
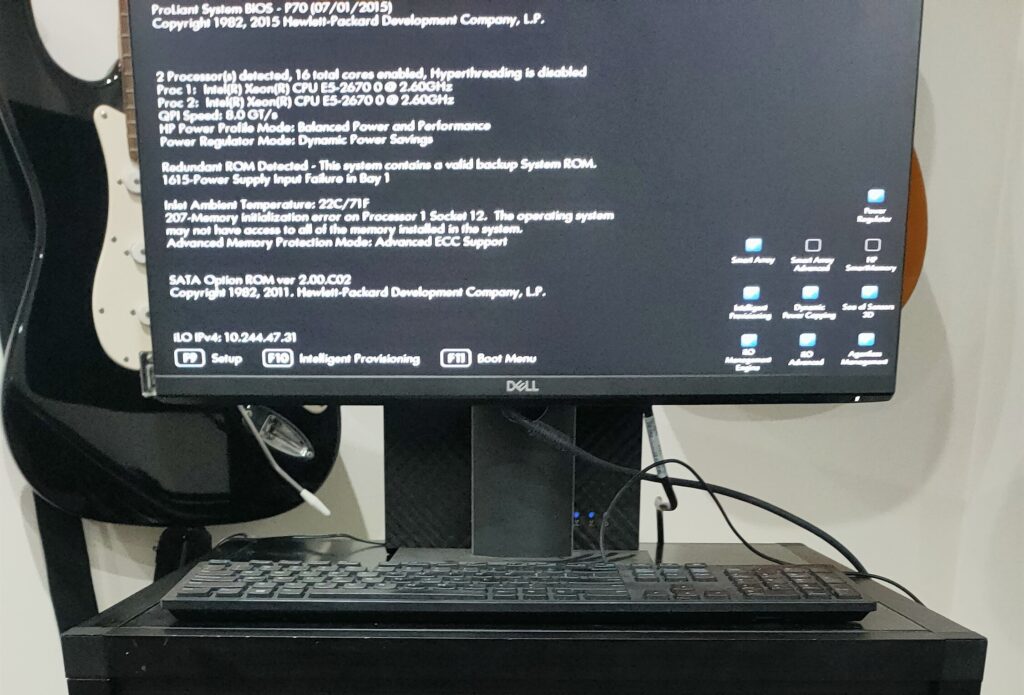
I accessed HP’s Intelligent Provisioning, where RAID 5 was pre-configured by default. This setup provides redundancy for hard drives by distributing storage across all 1.6TB of available space. Following this configuration, I power cycled the server and initiated the boot process from my USB.
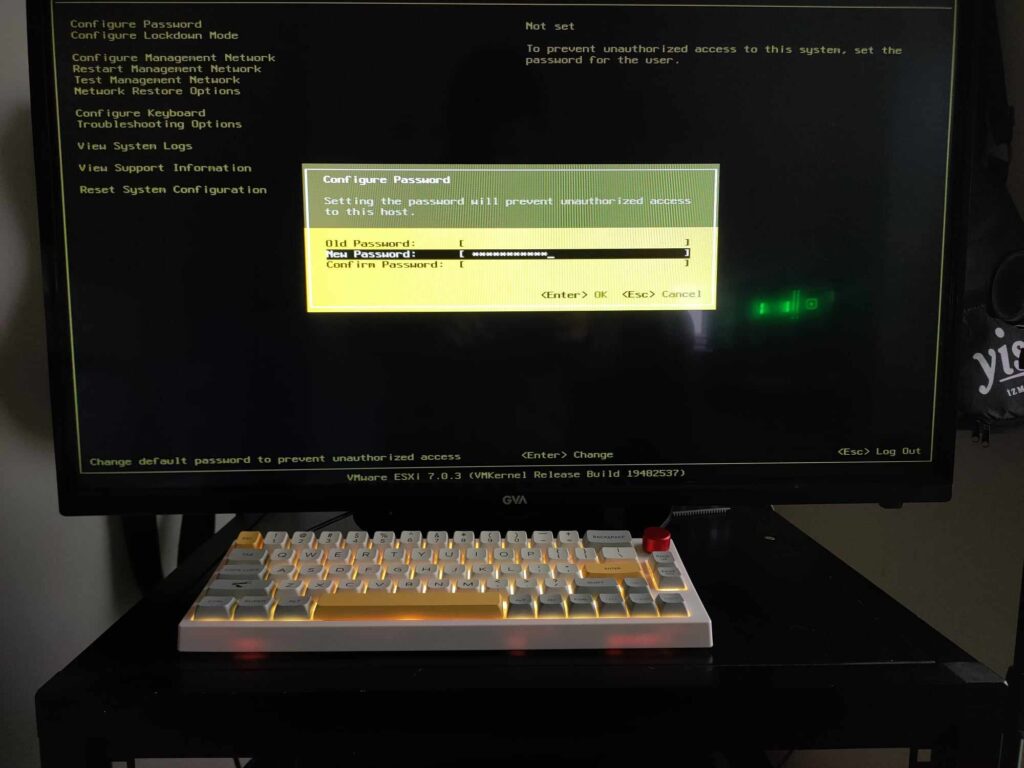
After a brief booting period, I accessed the VMware ESXi settings by pressing F2. An admin login appeared with the default username ‘root’ and an empty password field. I then selected ‘Configure Password’ and set up my own personal password.
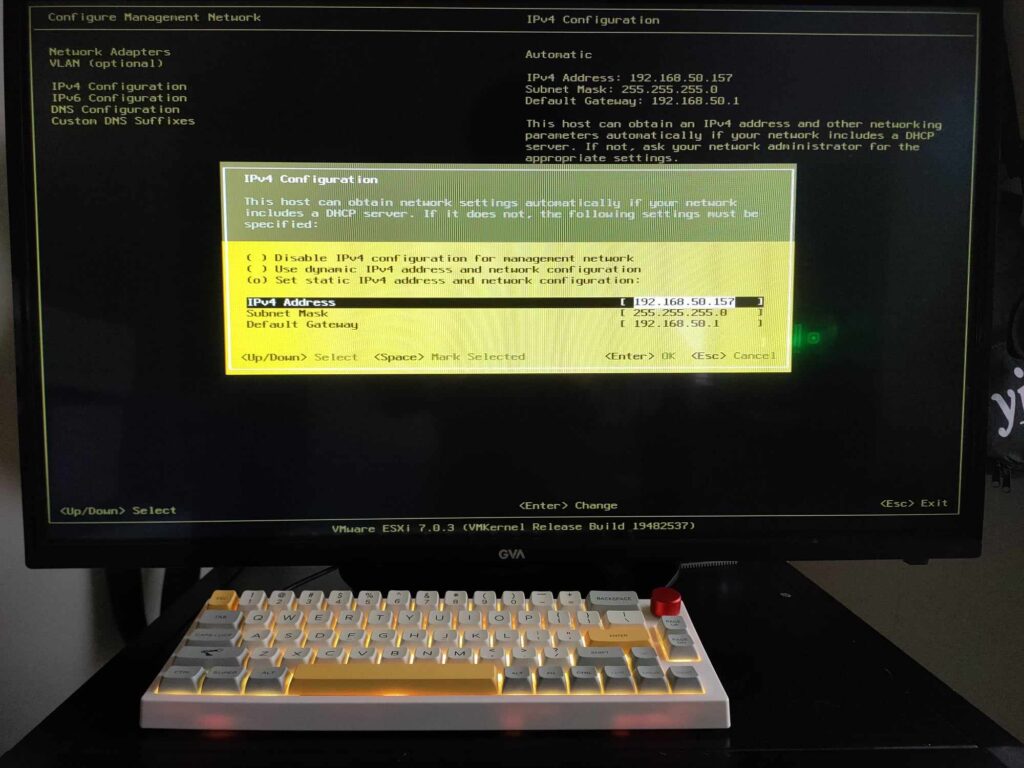
Continuing, I chose ‘Configure Management Network,’ where I was prompted to set a static IP, subnet mask, and gateway for our ESXi Server. Since I already had a static IP address ready on my router, I assigned it to this server.
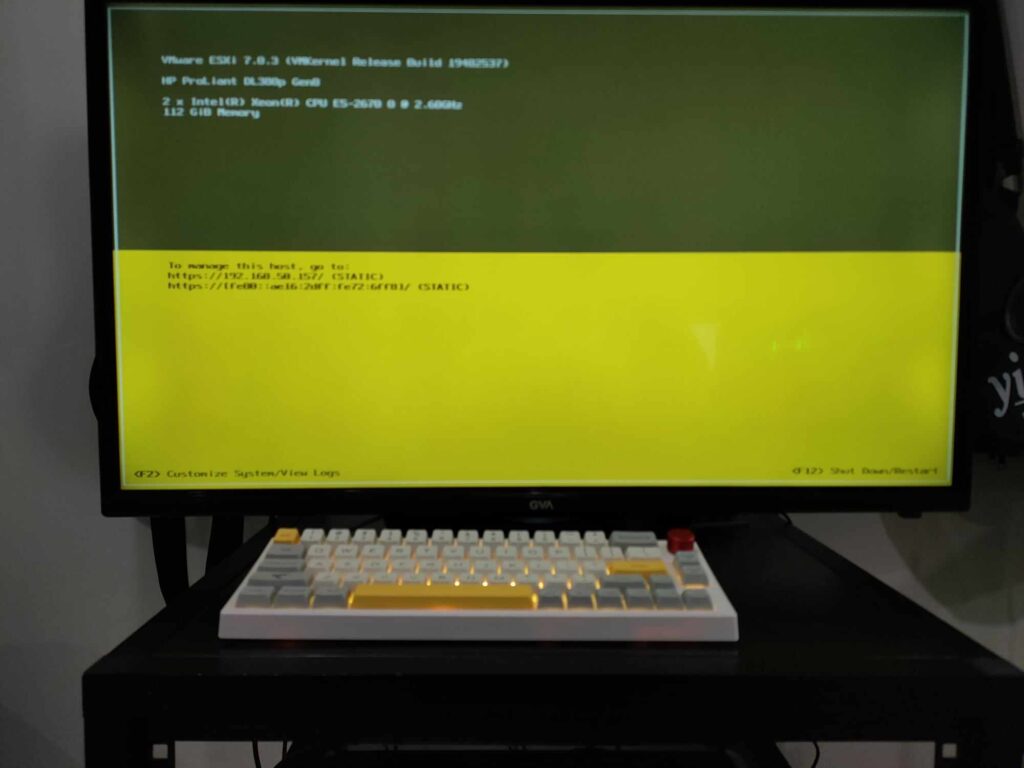
ESXi was finally ready, offering me a URL IP address to access the ESXi UI.