

Recently, I took on the task of transitioning our company from a traditional PBX phone system to a modern VOIP setup. To make this transition, I repurposed some of our old VOIP phones that were still functional. Additionally, we implemented 3CX as our softphone for managing VOIP connections. Due to 3CX support being limited to certain phone models, I implemented a Session Border Controller (SBC) to enable compatibility with our older VOIP phones. This approach allowed us to fully utilize our existing resources while benefiting from the advanced features and flexibility of the VOIP technology.
I’ve segmented this blog into two sections, Installation of SBC & VOIP Handset Configuration.
Installation of SBC

Using the documentation provided by 3CX as guidance, I began by downloading and running a 3CX SBC Debian ISO VM on our ESXI server.


I proceeded through the basic set up which included inputting the Hostname, root password, domain, language, keyboard etc. I finally selected the 3CX SBC to begin installation.

After installation, I was prompted with the 3CX Provisioning URL which was simply our FQDN provided by 3CX themselves followed by the port number (https://mycompany.3cx.com:5001).
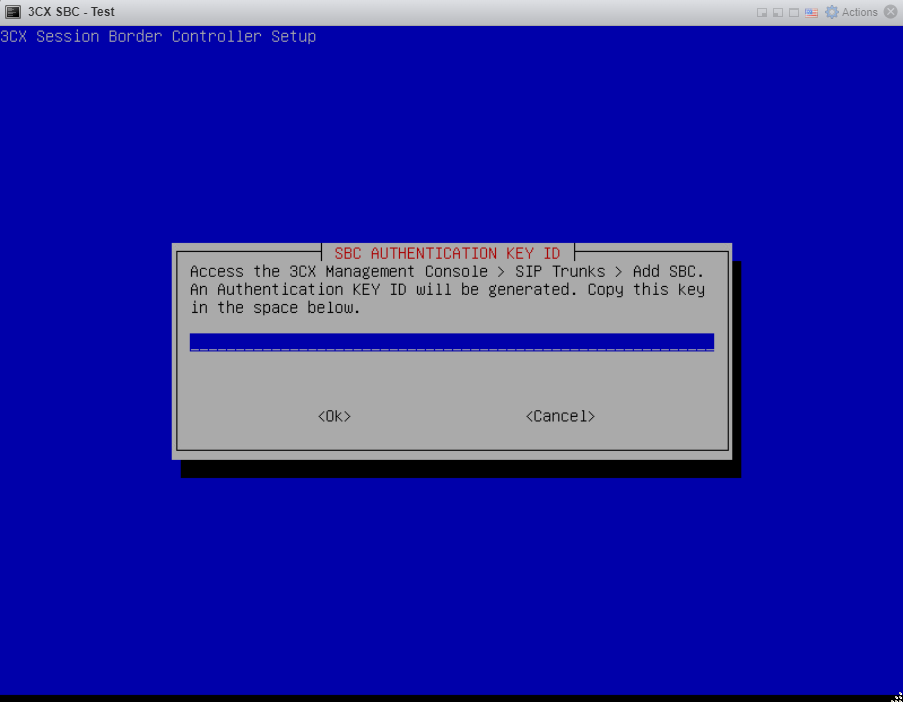

Next, I was prompted to generate an authentication key. I logged into 3CX admin console, accessed SIP Trunks and proceeded by pressing Add SBC. I named the SBC and input a password to complete. The SBC automatically generated an Authentication key ID which I input into the 3CX Debian SBC.
Finally the 3CX Debian SBC VM was complete.
VOIP Handset Configuration

Due to the fact that 3CX didn’t support our old VOIP Handsets and 3CX documentation was outdated, I managed to figure that the Add Phone option doesn’t work with our VOIP handsets. I proceeded to select 3CX App from the drop down menu under Phone.
I proceeded by gathering info for each user that I was providing a VOIP handset to, the info that I needed to gather was the ID and Password under the Authentication header.

I connected each phone to our network switches via the ethernet wall plate and began to factory reset each phone.

I then proceeded to gather the VOIP phones IP addresses and access the UI.

I logged into the handset UI via the IP address and accessed the configuration page via the EXT1 tab. I inputted the SIP Port 5060, Auth ID and Password that I gathered previously, additionally I’ve added a Display name and the extension number in the User ID field.

After waiting for a few minutes for the VOIP handset to reboot, the phone was successfully working with our 3CX softphone via the SBC.
In conclusion, implementing the VOIP system was a valuable learning experience, especially since I was initially unfamiliar with the concept of a session border controller. Navigating the challenge of repurposing older VOIP phones that weren’t directly supported by 3CX but were still compatible taught me an important workaround skill. I’m proud to have successfully implemented a functional and efficient VOIP system for the office.