

In this post, I’ll be showcasing the procedures I followed to set up a Fortinet network for a customer, including the installation and configuration of 1 x FortiGate 100F (Firewall) 2 x Fortiswitch 424E-POE (Switches) and 2 x FortiAP-421E (Access Points). Through this experience, I’ll highlight the steps taken to create a secure and reliable network, sharing insights along the way for those looking to implement Fortinet solutions.
I began by assembling the rack and placing the FortiGate on top, with the two FortiSwitches positioned close together for ease of cabling. This layout helped streamline the connections and set the stage for a smooth installation process.
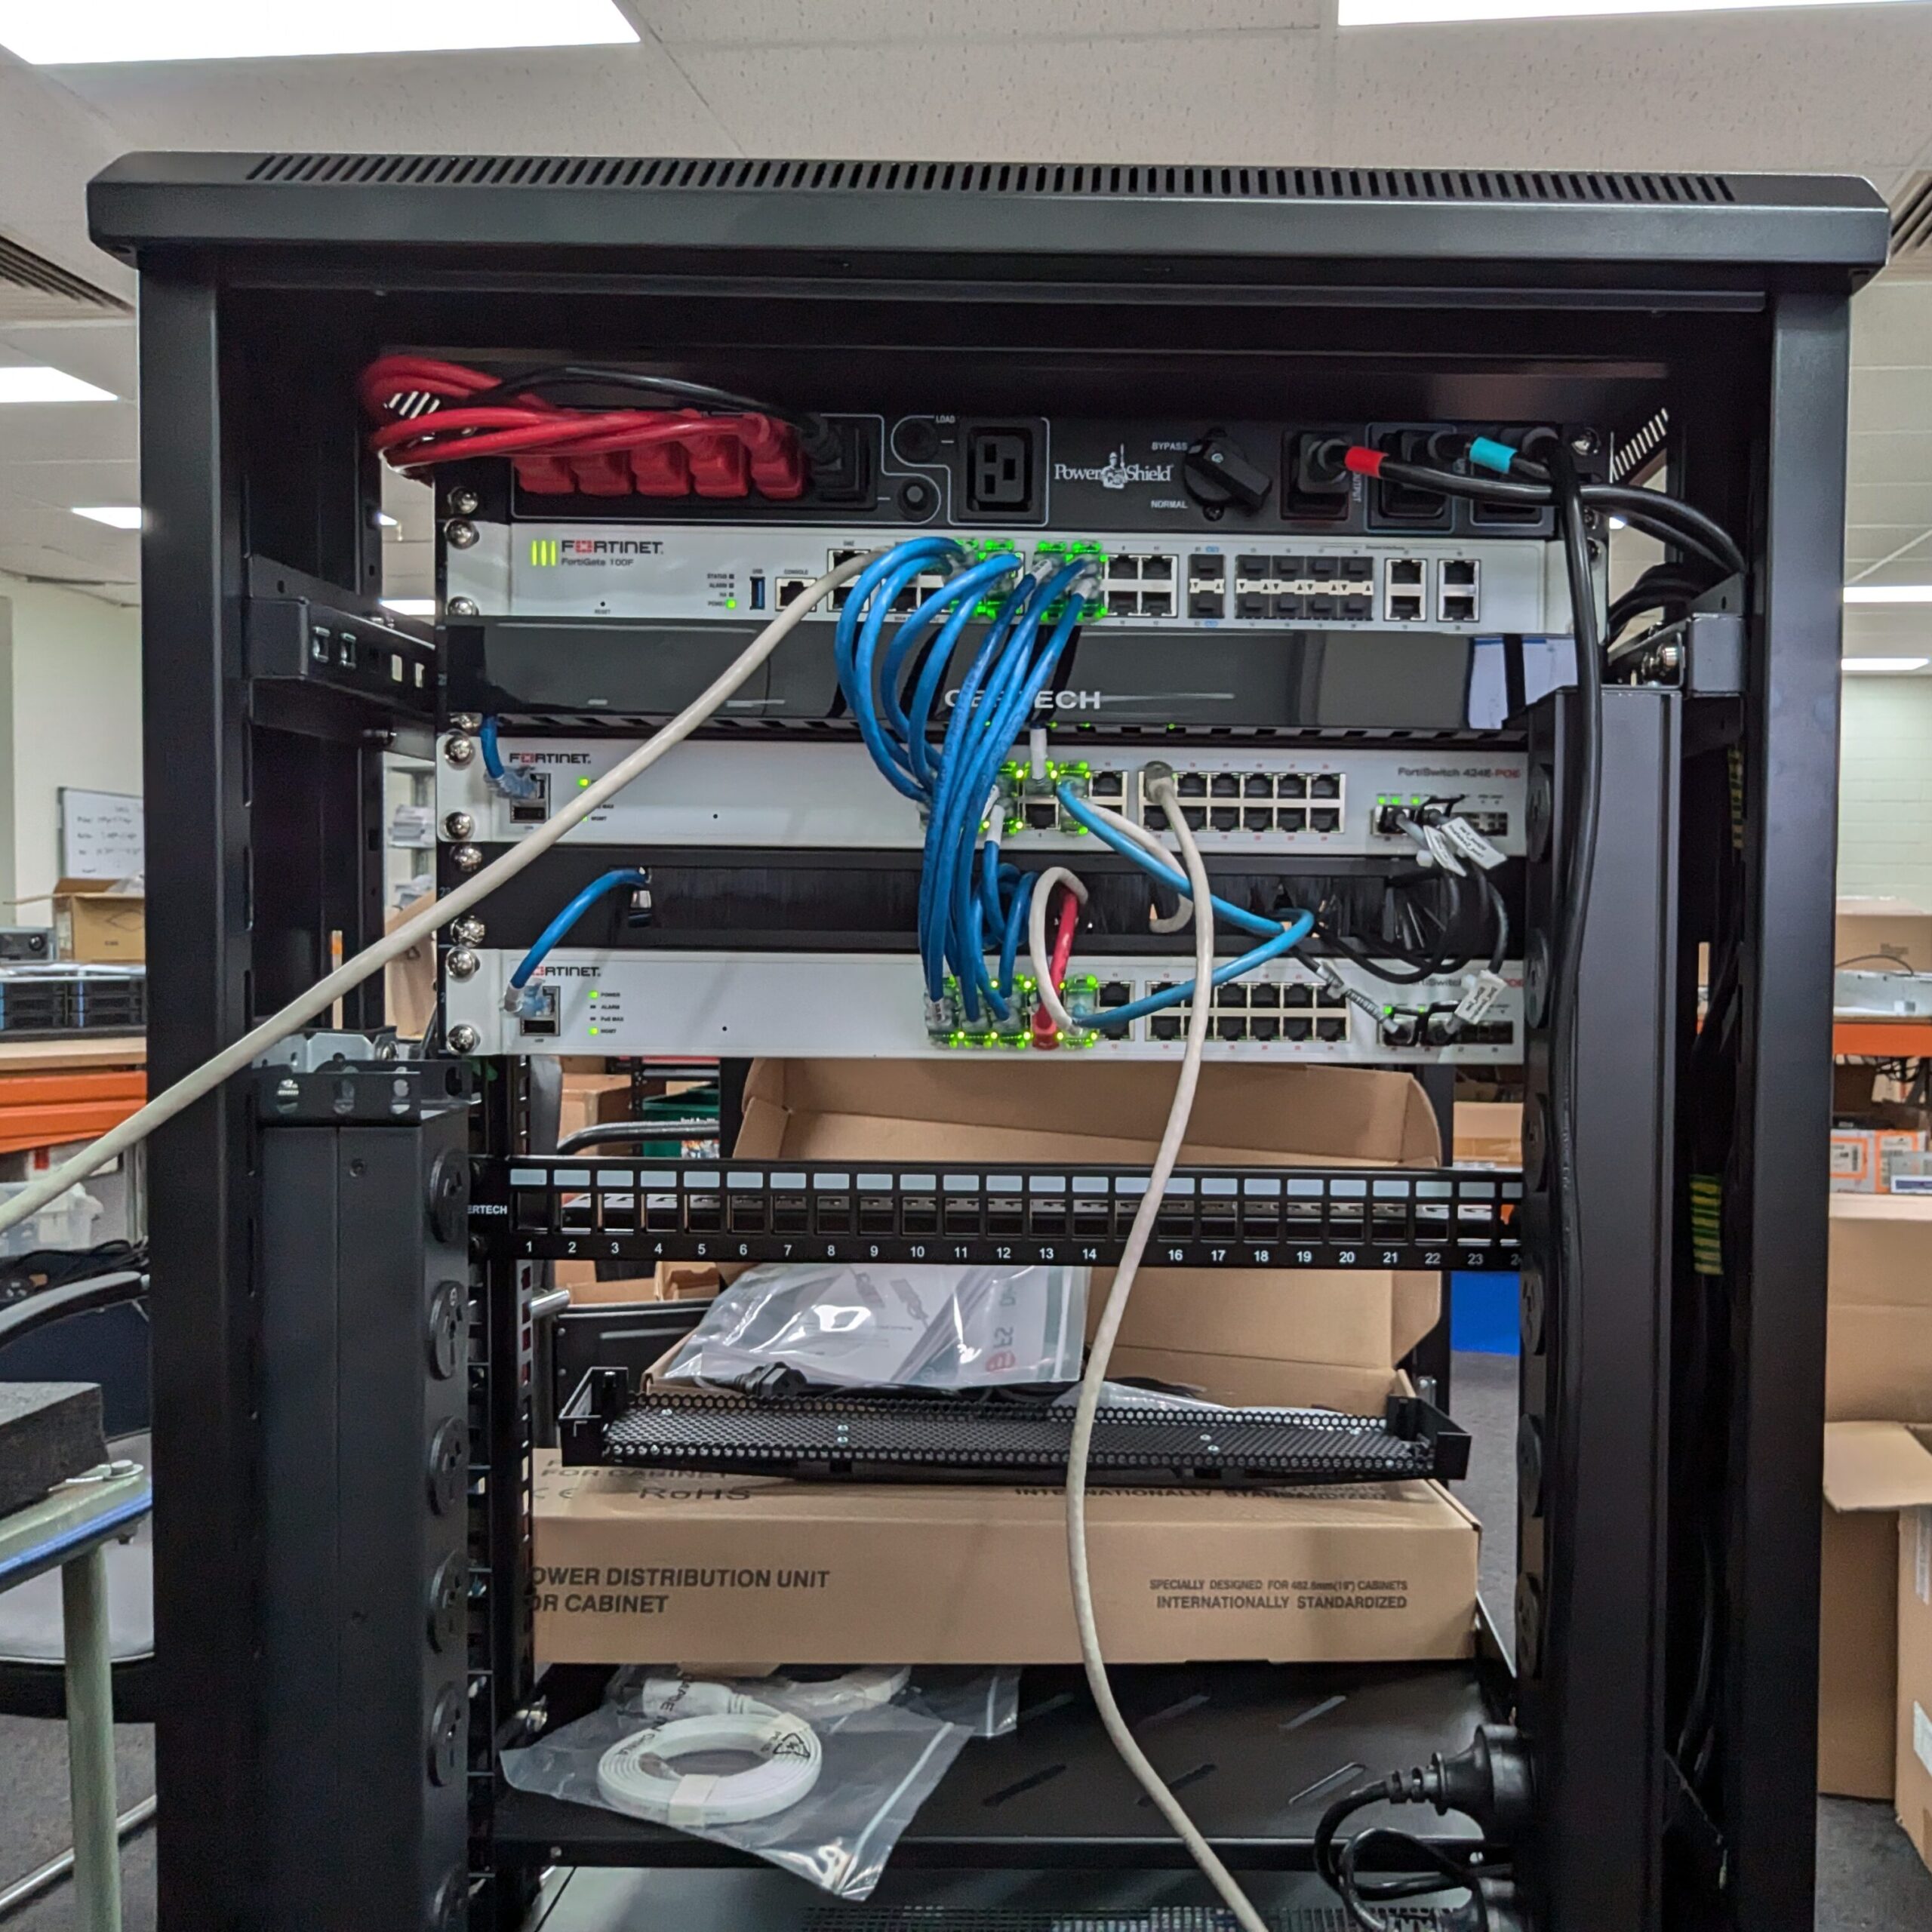
I planned the cabling between the switches and the firewall with redundancy and bandwidth in mind. I also connected the switches together to eventually configure them as a single unit, enhancing both redundancy and performance. To simplify management for the customer, I mirrored the ports on both switches for consistent configuration and easier troubleshooting. Throughout the process, we kept the customer’s IT team in mind to ensure a setup that was both efficient and easy to maintain.
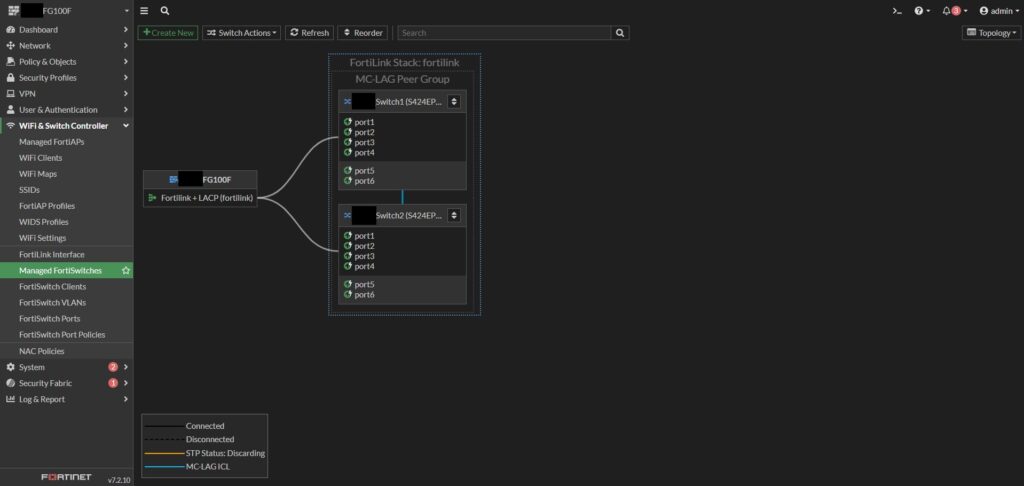
I began the configuration phase in the FortiGate UI by implementing the FortiLink (Fortinet controller), which uses Link Aggregation Control Protocol (LACP) to ensure redundancy and improved bandwidth between the firewall and switches. Within the FortiLink controller, I configured MCLAG to have the switches operate as a single unit. FortiLink makes this setup straightforward, providing visual diagrams to map out the topology. In the diagram above, Ports 1 through 4 on both switches are allocated for LACP, while Ports 5 and 6 are allocated for MCLAG.
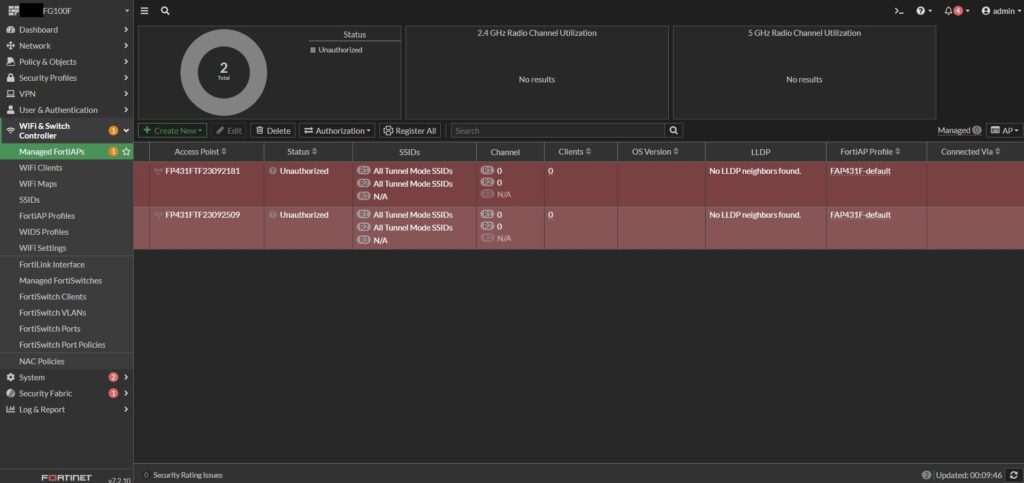
I followed this by adding the FortiAPs to the FortiLink controller, making it easier to manage WLAN settings, RF configurations and connected clients from a single interface.
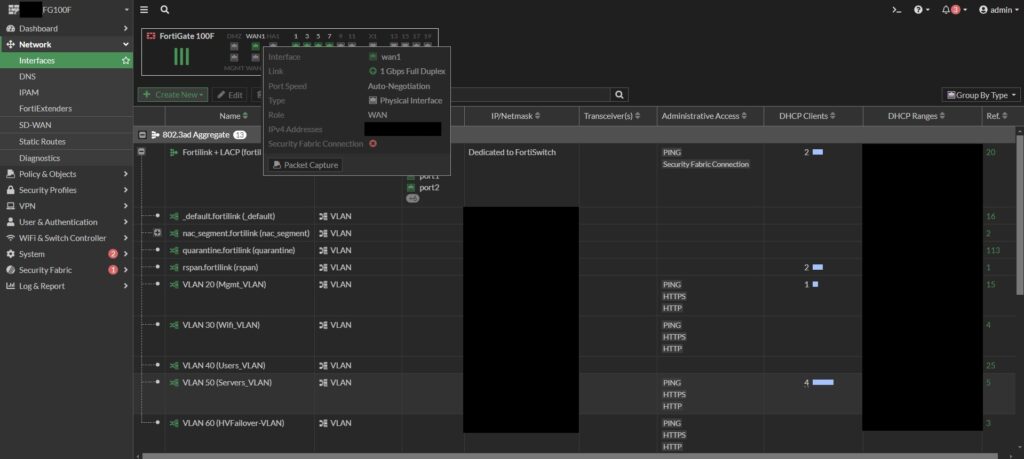

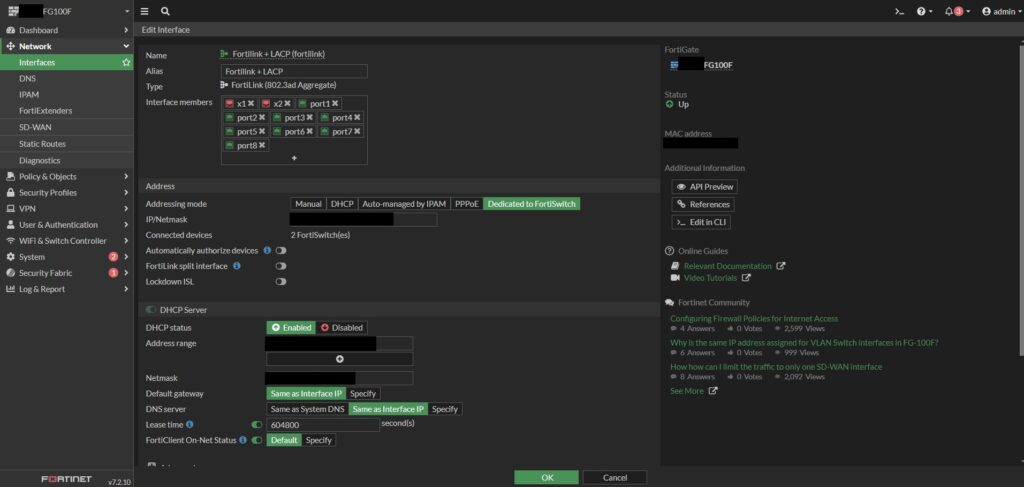
I configured the networks and VLANs in line with the customer’s request. To simplify initial setup, I enabled a DHCP service for each network. Once the configuration was complete, I disabled certain DHCP services, as the servers in the rack would handle DHCP for certain VLANs in the final setup.
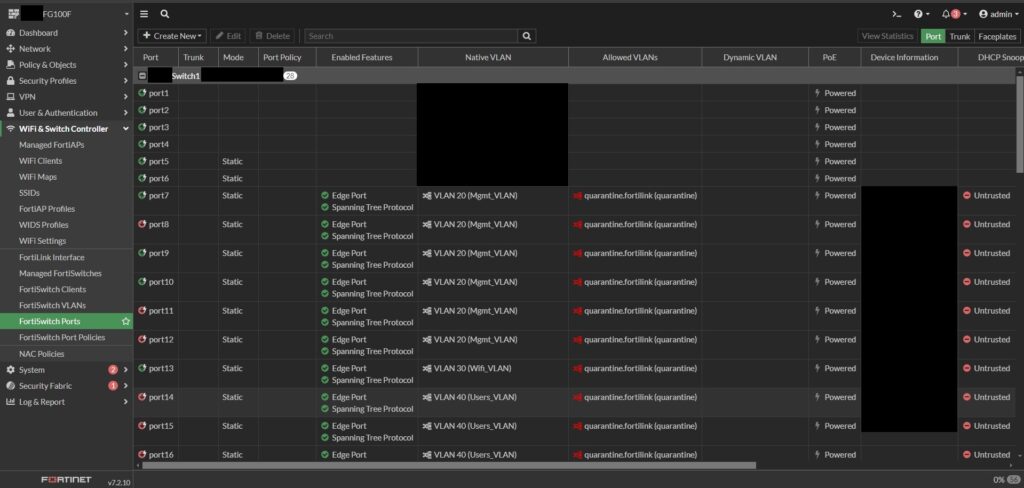
As I neared the end of the network setup, I configured port allocations based on the required VLANs. The FortiLink controller made this process seamless by allowing me to manage ports on the firewall and both switches from a single page, making it efficient and easy. It also provides real-time monitoring of connected devices and end-user MAC addresses.
I finalised the project by configuring the firewall policies (though I unfortunately forgot to capture images of this step). Fortinet makes this process incredibly easy and user-friendly, simply requiring you to select the source, destination, and action. You can also configure schedules and other useful features. For the firewall policies, our team worked with the customer to discuss their preferences and implemented the configuration based on their requirements.
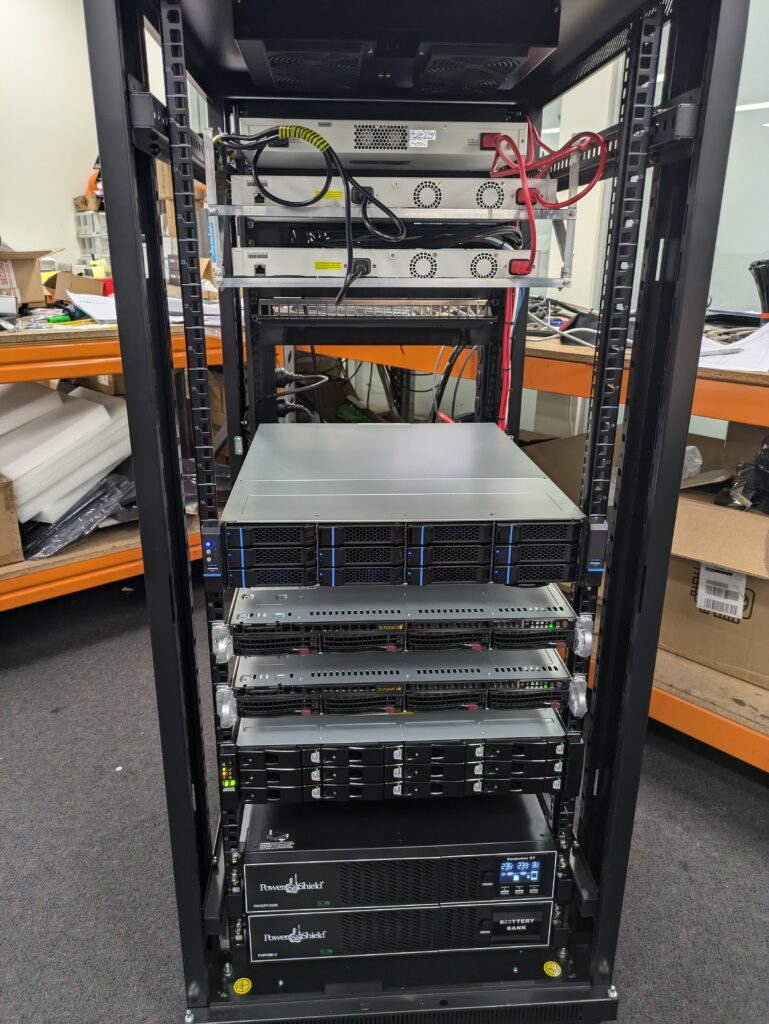
Here’s a final look at the entire rack. The setup was smooth and easy, thanks to Fortinet’s simple interface. Compared to other brands like Ubiquiti and Palo Alto, I found Fortinet to be more intuitive, which made the process much more efficient. With everything configured, the network is now ready to provide reliable performance and ready to use for the customer.


